MySQL 8.0 comes with a load of new features and bug fixes. In this guide we will learn how to install MySQL 8.0 on an Ubuntu 22.04 server.
Prerequisites
- Server with Ubuntu 22.04
- root access to the server
Procedure
To install MySQL 8.0, follow the steps below
1.Download and Install MySQL 8.0 repo
root@mysql01:~# wget https://dev.mysql.com/get/mysql-apt-config_0.8.22-1_all.deb
root@mysql01:~# dpkg -i mysql-apt-config_0.8.22-1_all.deb
2. Update repos
root@mysql01:~# apt update
PS: if you get an error on missing packages, please check the Troubleshooting section
3. Install MySQL 8.0
root@mysql01:~# apt install mysql-client mysql-server
PS: if you experience any errors at this stage, check the troubleshooting section below
4.While installation continues, you will receive a prompt to enter the error password and to select the default authentication plugin. For this, I personally prefer the Legacy Authentication Method
5.Once done, reboot the system if you were prompted so as to apply any kernel changes.
Troubleshooting
You may experience the following errors
- Error1: Missing libssl1.1 (>= 1.1.1) package

Fix
Ubuntu 22.04 uses libssl 3 instead of libssl1.1. To force install libss1.1, add Ubuntu 21.10’s repo source as follows
root@mysql01:~# echo "deb http://security.ubuntu.com/ubuntu impish-security main" | sudo tee /etc/apt/sources.list.d/impish-security.list
Now update and install libssl1.1
root@mysql01:~# apt update
root@mysql01:~# apt-get install libssl1.1
The install MySQL 8.0
root@mysql01:~# apt install mysql-client mysql-server
- Error2: gnupg is not installed
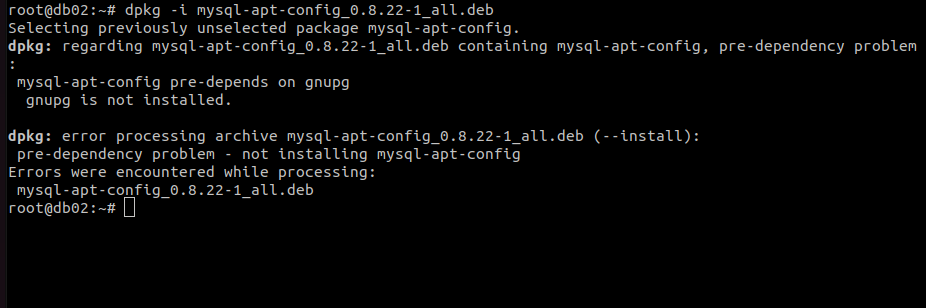
Fix
Install gnupg2 package
root@db01:~# apt-get install gnupg2