In our project, the web server will be running on Apache. Of course Nginx is another great web server, but here, I’ll use Apache v2.4. If you’d like the Nginx version of this article, please click here.
The site runs on PHP as well and so, we’ll be installing php7.0 to facilitate the proper working of the website.
Prerequisites
- A VPS with Centos 7 installed
- Root access to the server
What do we want?
We want to set up a server so as it should run website on Apache. The site should also run on SSL.
Procedure
1. Login to your server as root
2. Install Apache web server and mod_ssl
[root@web
~]# yum install -y httpd
mod_ssl
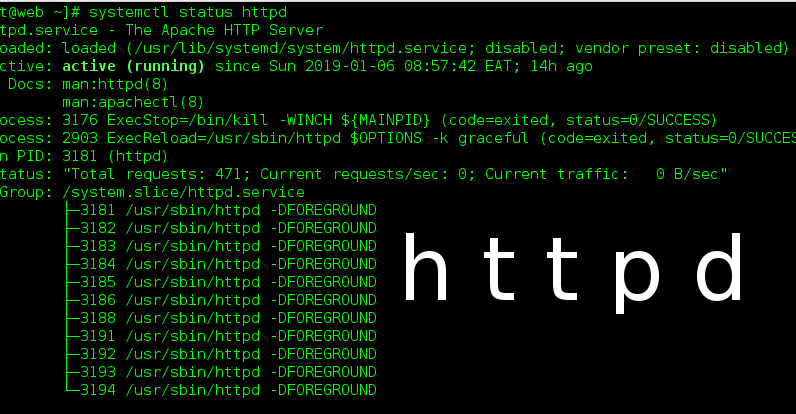
3. Start and enable Apache
[root@web
~]#
systemctl start httpd
[root@web
~]#
systemctl enable httpd
4. Install php 7.0 as below:
- Install epel repository and remi repository
[root@web ~]# yum install epel-release -y
[root@web ~]# yum install http://rpms.remirepo.net/enterprise/remi-release-7.rpm
- Install yum-utils. We need it for the yum-config-manager package [root@web ~]# yum install yum-utils -y
- Enable remi repository for installing php7.0. If you would like to install php 7.1 or 7.2, replace the 70 in the command above with 71 or 72 respectively.
[root@web ~]# yum-config-manager --enable remi-php70
- Run the command below to install php 7.0 with some necessary modules
[root@web ~]# yum install php php-mcrypt php-cli php-gd php-curl php-mysql php-mysqli php-ldap php-zip php-fileinfo
-
You can then
check if your php version has been installed
[root@web ~]#php –version
5. Create a vhost
We now need to define a vhost file that will have the Apache directives for our site eg Document root.
Navigate to /etc/httpd/conf.d folder and create a file called example.co.ke.conf. Copy the following in the file and save.
<VirtualHost
*:80>
DocumentRoot
/home/example/public_html
ServerName example.co.ke
ServerAlias www.example.co.ke
</VirtualHost>
From the above vhost, our document root is located in /home/example/public_html . This is a path we created so as to act as Document root instead of the normal /var/www/html folder. You may specify another location as you wish but make sure the permissions are okay for access. Rule of thumb is: All directories should be 0755 while all files should be 0644
Now restart Apapche
[root@web
~]#
systemctl
restart httpd
6. Upload content to your root folder. You may use any method available for you including FileZilla(needs FTP installed ) or a nice solid command such as scp which uses SSH to transfer files
Your website should now be well accessible online via a browser. To complete the setup, however, we need to install SSL certificate for the domain. It’s a good habit to install SSL for your site, the world is moving to a 100% encrypted internet.
7. Install SSL
- Generate CSR for your domain. Click here to learn how to do this from the command line.
- Obtain your SSL certificate from preferred vendor using the CSR you generated and upload them to a folder on your server. I recommend you save them in the same folder as the CSR and Key the step above
- On your web server access the Apache vhost configuration file. Create another vhost section and copy lines in step (5) then change *:80 to *:443. Finally add the following code just before </Virtual Host> line
SSLEngine
on
SSLCertificateFile
/path/to/your_domain_name.crt
SSLCertificateKeyFile
/path/to/your_private.key
SSLCertificateChainFile
/path/to/CA.crt
Replace the respective paths to the files with your actual ones.
Now, if you restart Apache and fail to include the virtual host listening to port 80 at this point then try accessing the site, you will get a Error 400: Bad Request error. Your webserver is unable to service http request as the vhost we have defined forces https via port 443. And of course, it’ll be unimaginable to ask visitors to precede https on your domain name every time they’re accessing. To allow http requests to be served as well, you need to include the virtual host for port 80. Thus your file in after the whole process should look like this:
<VirtualHost *:443>
DocumentRoot
/home/example/public_html
ServerName
example.co.ke
ServerAlias
www.example.co.ke
SSLEngine on
SSLCertificateFile
/home/example/certs/example.co.ke.cer
SSLCertificateKeyFile
/home/example/certs/example.co.ke.key
SSLCertificateChainFile
/home/example/certs/example.co.ke.ca
</VirtualHost>
<VirtualHost *:80 >
DocumentRoot
/home/example/public_html
ServerName
example.co.ke
ServerAlias
www.example.co.ke
</VirtualHost>
Alternatively, you can redirect all traffic to https by using the configuration file below instead:
<VirtualHost
*:443>
DocumentRoot
/home/example/public_html
ServerName
example.co.ke
ServerAlias
www.example.co.ke
SSLEngine
on
SSLCertificateFile
/home/example/certs/example.co.ke.cer
SSLCertificateKeyFile
/home/example/certs/example.co.ke.key
SSLCertificateChainFile
/home/example/certs/example.co.ke.ca
</VirtualHost>
<VirtualHost
*:80>
DocumentRoot
/home/example/public_html
ServerName
example.co.ke
ServerAlias
www.example.co.ke
Redirect
/ https://www.example.co.ke
</VirtualHost>
8. Next disable the default ssl configuration file – /etc/httpd/conf.d/ssl.conf by renaming it. Note that, we don’t want it to end with .conf otherwise it’ll still be processed by apache. so add something towards the end of file name eg ssl.conf.hold.
9. After that access your vhost file and add the following line at the top – outside <VirtualHost></VirtualHost>
Listen 443 https
You can also choose to , instead of adding the above line to vhost,
add the line Listen 443 to
/etc/httpd/conf/httpd.conf file.
Note that you can only have Listen 443
in either file but not both.
10. Restart Apache.
[root@web ~]#
systemctl
restart httpd
That should do it. Now you have your site up and running on well!
Hi, I check your blogs like every week. Your story-telling style is
witty, keep it up! Greetings from California!
I’m bored at work so I decided to browse your website on my iphone
during lunch break. I love the info you provide here and can’t wait to take a
look when I get home. I’m amazed at how fast your blog loaded on my phone ..
I’m not even using WIFI, just 3G .. Anyhow, awesome
blog! This is a topic that’s near to my heart…
Thanks Jim, you can get intouch with us via our contact form