Proxmox VE is a popular, feature-full virtualization platform. It allows creation of cloud-init based images, which allow you to customize your images a great deal. This means you can embed things like your SSH keys or utility software e.g vim and have them available by default for use in your image.
In this guide, we will go through the process of creating a cloud-init image for a Proxmox VE platform. We will use Ubuntu 22.04 image. By the end of the article, we should have a ready template from where we can quickly create VMs.
Prerequisites
- Have Proxmox VE already installed on a server (Proxmox VE version 7.2.3 used)
- Have root SSH access to the computer where Proxmox VE is installed
Procedure
1.Login to the server via SSH using root user
2.Download the Ubuntu Cloud image from http://cloud-images.ubuntu.com. In our case, we will use the /jammy/current/jammy-server-cloudimg-amd64.img image
root@pve:~# wget http://cloud-images.ubuntu.com./jammy/current/jammy-server-cloudimg-amd64.img
3. Create a new VM assigning it 1GB memory
root@pve:~# qm create 9000 --name ubuntu2204 --memory 1024 --net0 virtio,bridge=vmbr0
4. Import the image you downloaded in step 2 to the local-lvm storage. If your proxmox has diffrent storage you want to use, change local-lvm to that storage
root@pve:~# qm importdisk 9000 jammy-server-cloudimg-amd64.img local-lvm
importing disk 'jammy-server-cloudimg-amd64.img' to VM 9000 …
Logical volume "vm-9000-disk-0" created.
...
transferred 2.2 GiB of 2.2 GiB (100.00%)
Successfully imported disk as 'unused0:local-lvm:vm-9000-disk-0'
5.Attach the disk to the VM as a scsi disk
root@pve:~# qm set 9000 --scsihw virtio-scsi-pci --scsi0 local-lvm:vm-9000-disk-0
update VM 9000: -scsi0 local-lvm:vm-9000-disk-0 -scsihw virtio-scsi-pci6. Next, configure a CD-ROM that can be used to install the OS as follows
root@pve:~# qm set 9000 --ide2 local-lvm:cloudinit
update VM 9000: -ide2 local-lvm:cloudinit
Logical volume "vm-9000-cloudinit" created.
ide2: successfully created disk 'local-lvm:vm-9000-cloudinit,media=cdrom'
7. Set the bootdisk parameter to scsi0, and restrict BIOS to boot from disk only.
root@pve:~# qm set 9000 --boot c --bootdisk scsi0
update VM 9000: -boot c -bootdisk scsi08. Configure a serial console and use it as a display. Many Cloud-Init images rely on this, as it is an requirement for OpenStack images.
root@pve:~# qm set 9000 --serial0 socket --vga serial0
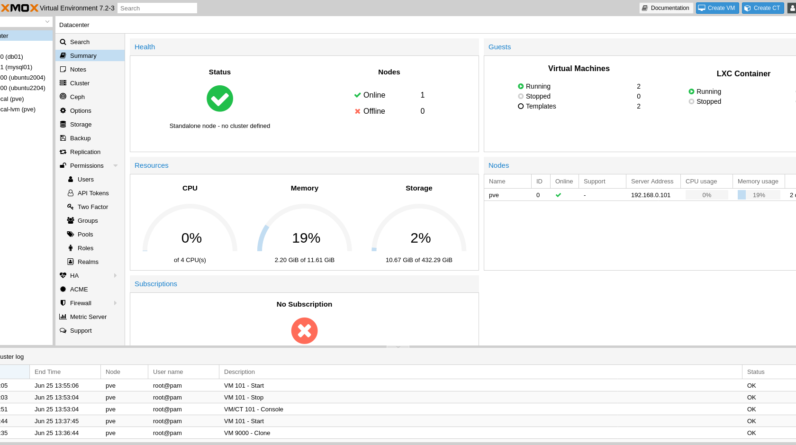
update VM 9000: -serial0 socket -vga serial0For the rest of the process, access your Proxmox VE dashboard and login as root.
9.Navigate to Datacenter >> pve then click on your Ubuntu2204 VM and click Cloud-Init
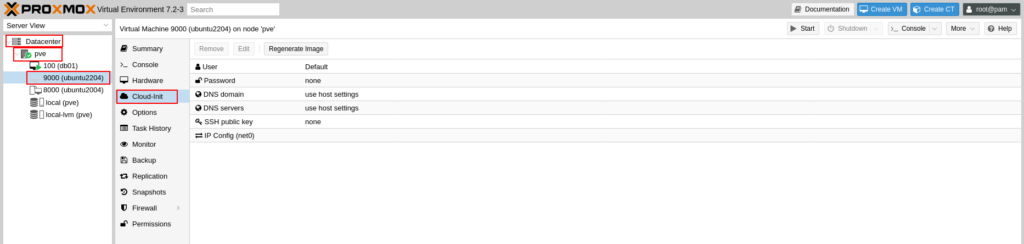
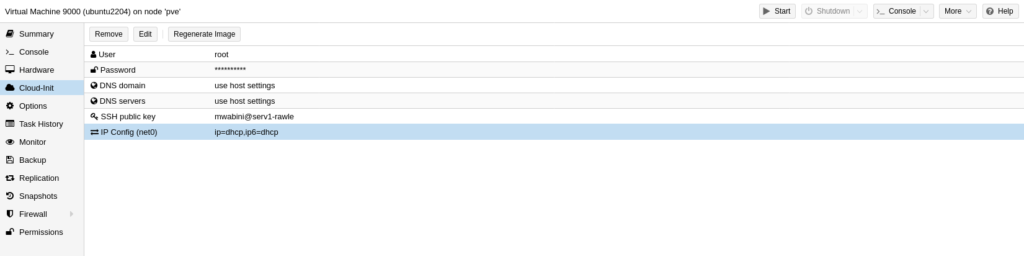
10.Click on each of the columns User, Password, DNS Domain, DNS Servers, SSH key and IP Config provided and fill in the details as needed. Then click Regenerate Image
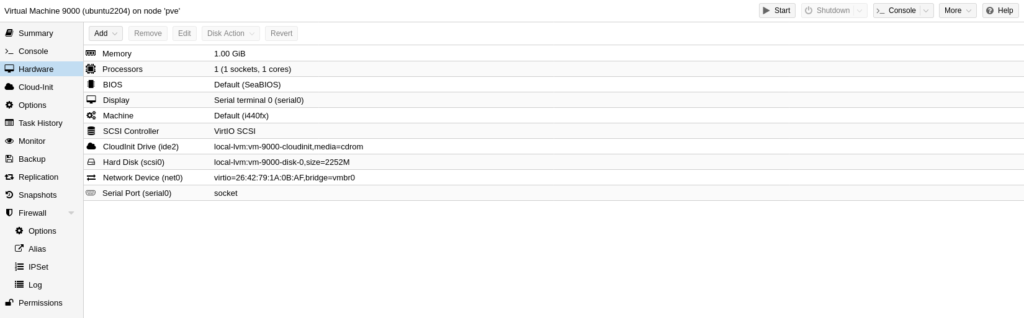
11. [OPTIONAL]. Click Hardware tab and increase the RAM(called Memory), CPU(called Processors) and Disk storage(called Hard Disk). Note, to increase storage, click on the Hard Disk column then go to Disk Action >> Resize
12. On the Server View pane, on your left, right click on the VM and click Convert to Template. Once converted, you will see its icon change.
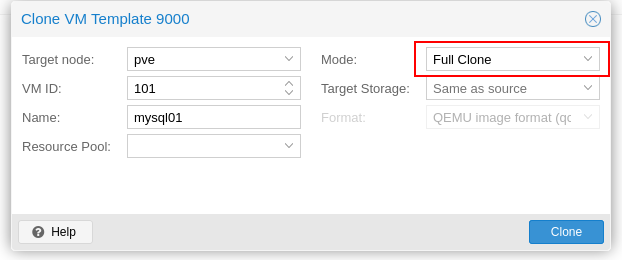
13. Your template is ready! Now to create a VM from it, right click on the template and click Clone. Fill in the details requested. Make sure to select Mode as Full Clone so the new VM does not have direct links to the template.
14. Once Cloning completes, go to the Console, login with the default credentials and type ip -a to get your VM assigned IP address. You can then login to the VM using the IP from your any computer in the network.
PS: On initial boot, cloud-init will update your VM packages before booting completes.